
The Transom
Here is the original transom, before I did any work. The boat came with an aluminum frame that is bolted to the transom at each end, to help stiffen it. It also supports the control cables for the motor, and attaches to another frame (not shown) that supports the fuel tank and battery off of the bottom of the boat. I removed this piece, and will clean it up before putting it back in.
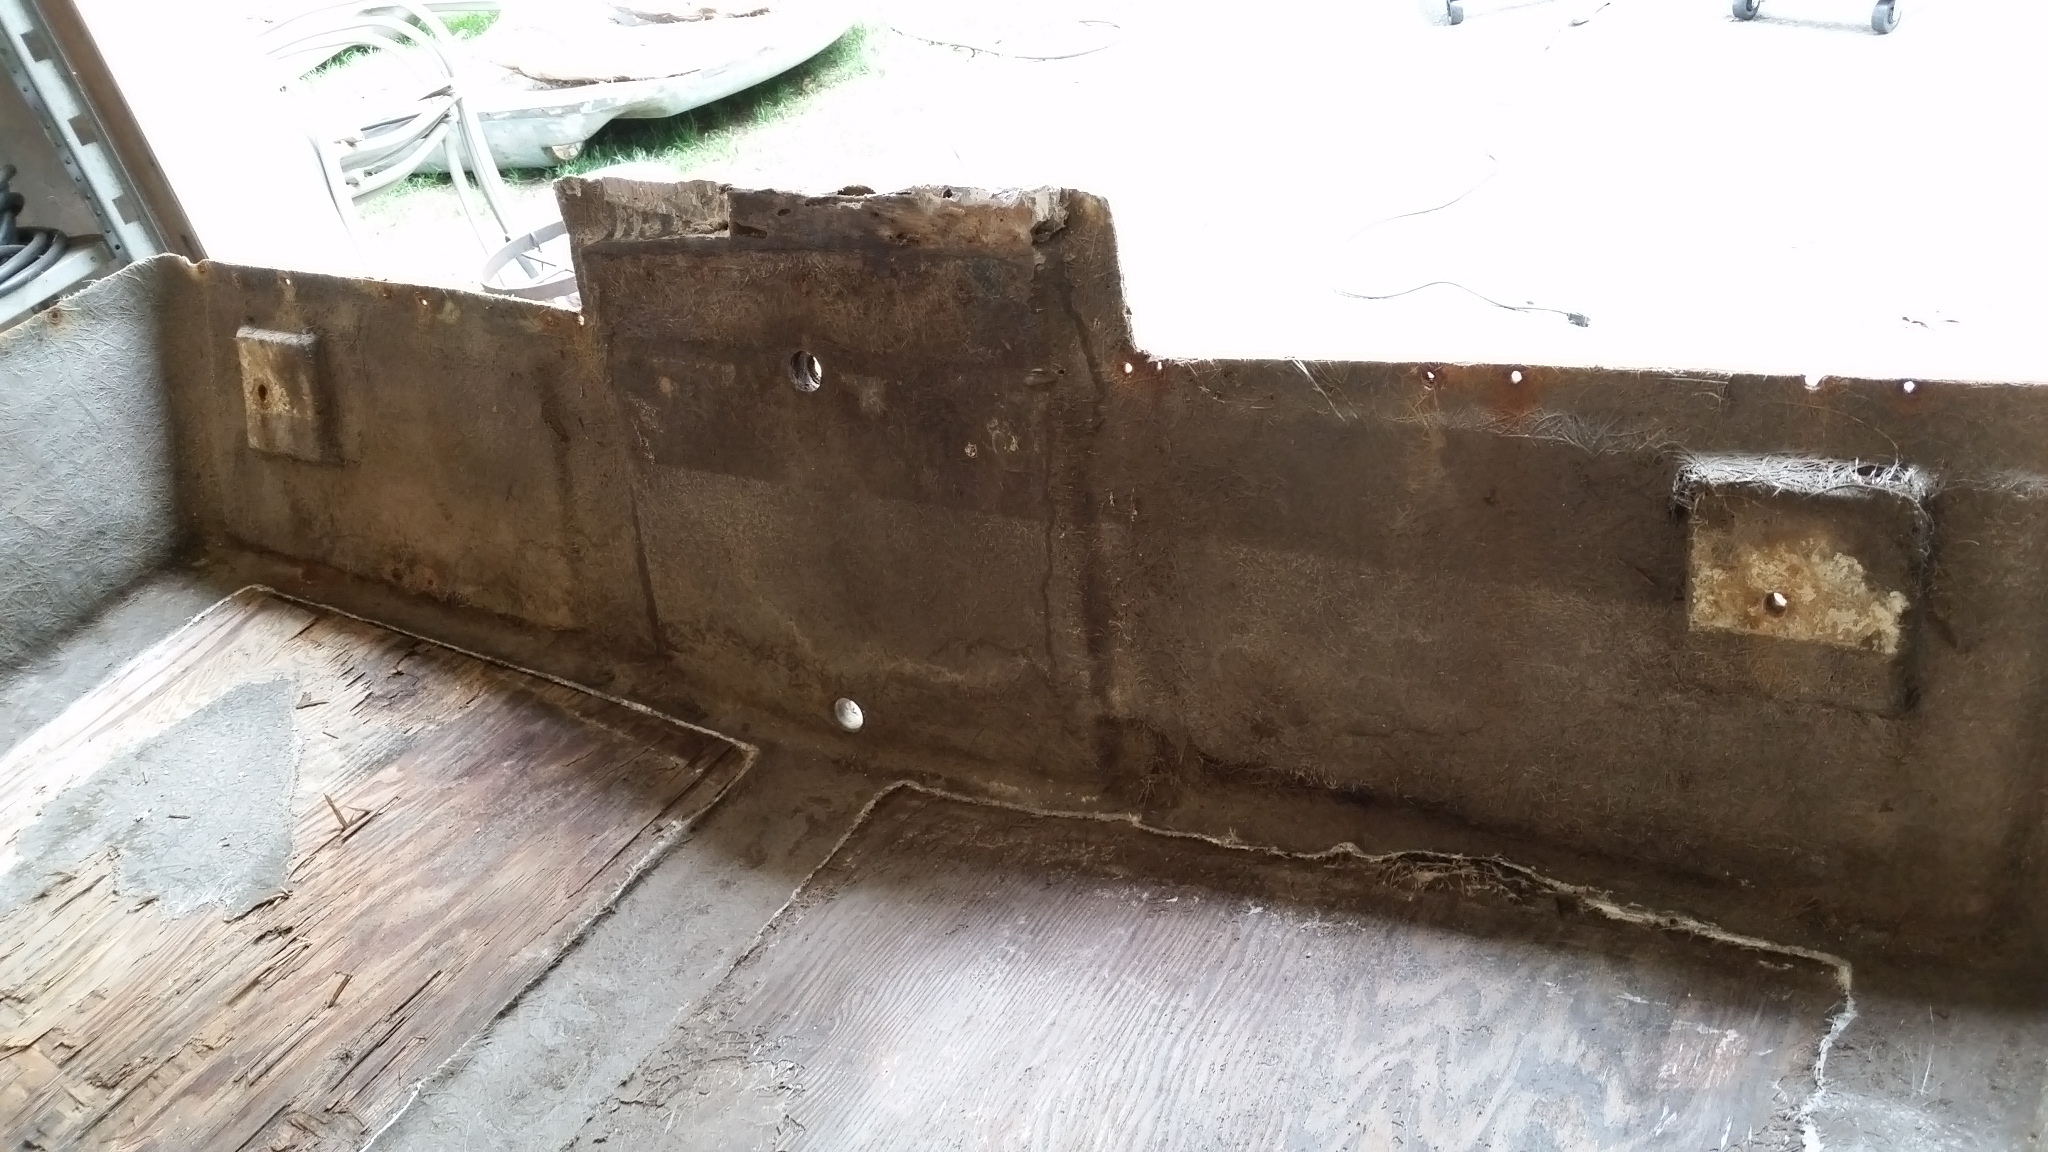
A view of the transom without the aluminum bracket. After checking it closely, I realized it had several major problems and would have to be completely gutted. The wood under the fiberglass was rotted, and it was poorly constructed with three separate pieces of plywood that were too thin, and there was a 2" band of just fiberglass between each section, making it very weak and flexible. I will have to redo it with layers of marine plywood that go all the way across, and a thicker piece in the center. My plan is to do two layers of 1/4" all the way across (I need it to bend, the transom is not straight at the ends), and then a thicker piece in the middle.

Here is how it looked after removing the top layer of fiberglass and pulling out all the rotted wood.
This is after removing the extra layers of fiberglass, and grinding everything down to one level layer. Even more grinding was done after this photo.

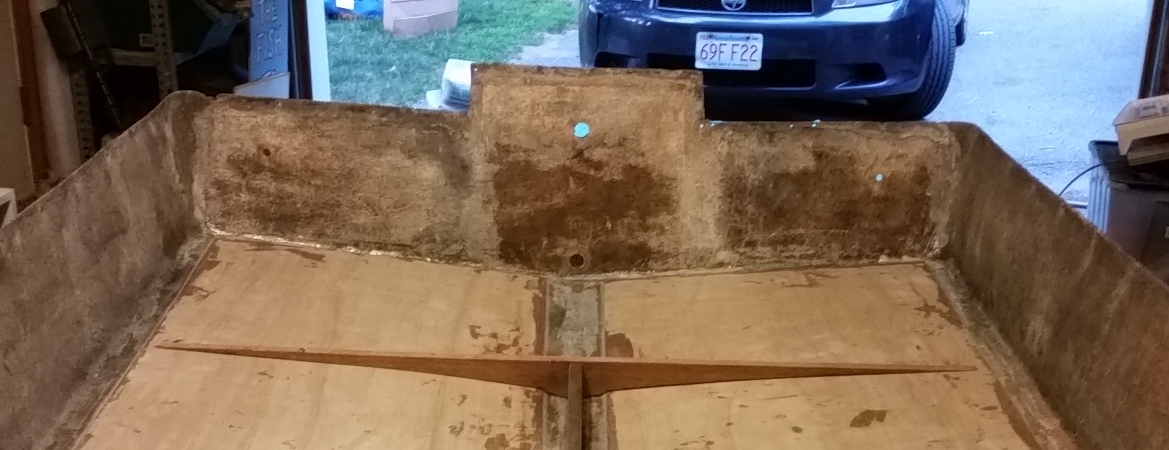
I used a large piece of cardboard to template this piece, and this was the first layer before gluing it down.
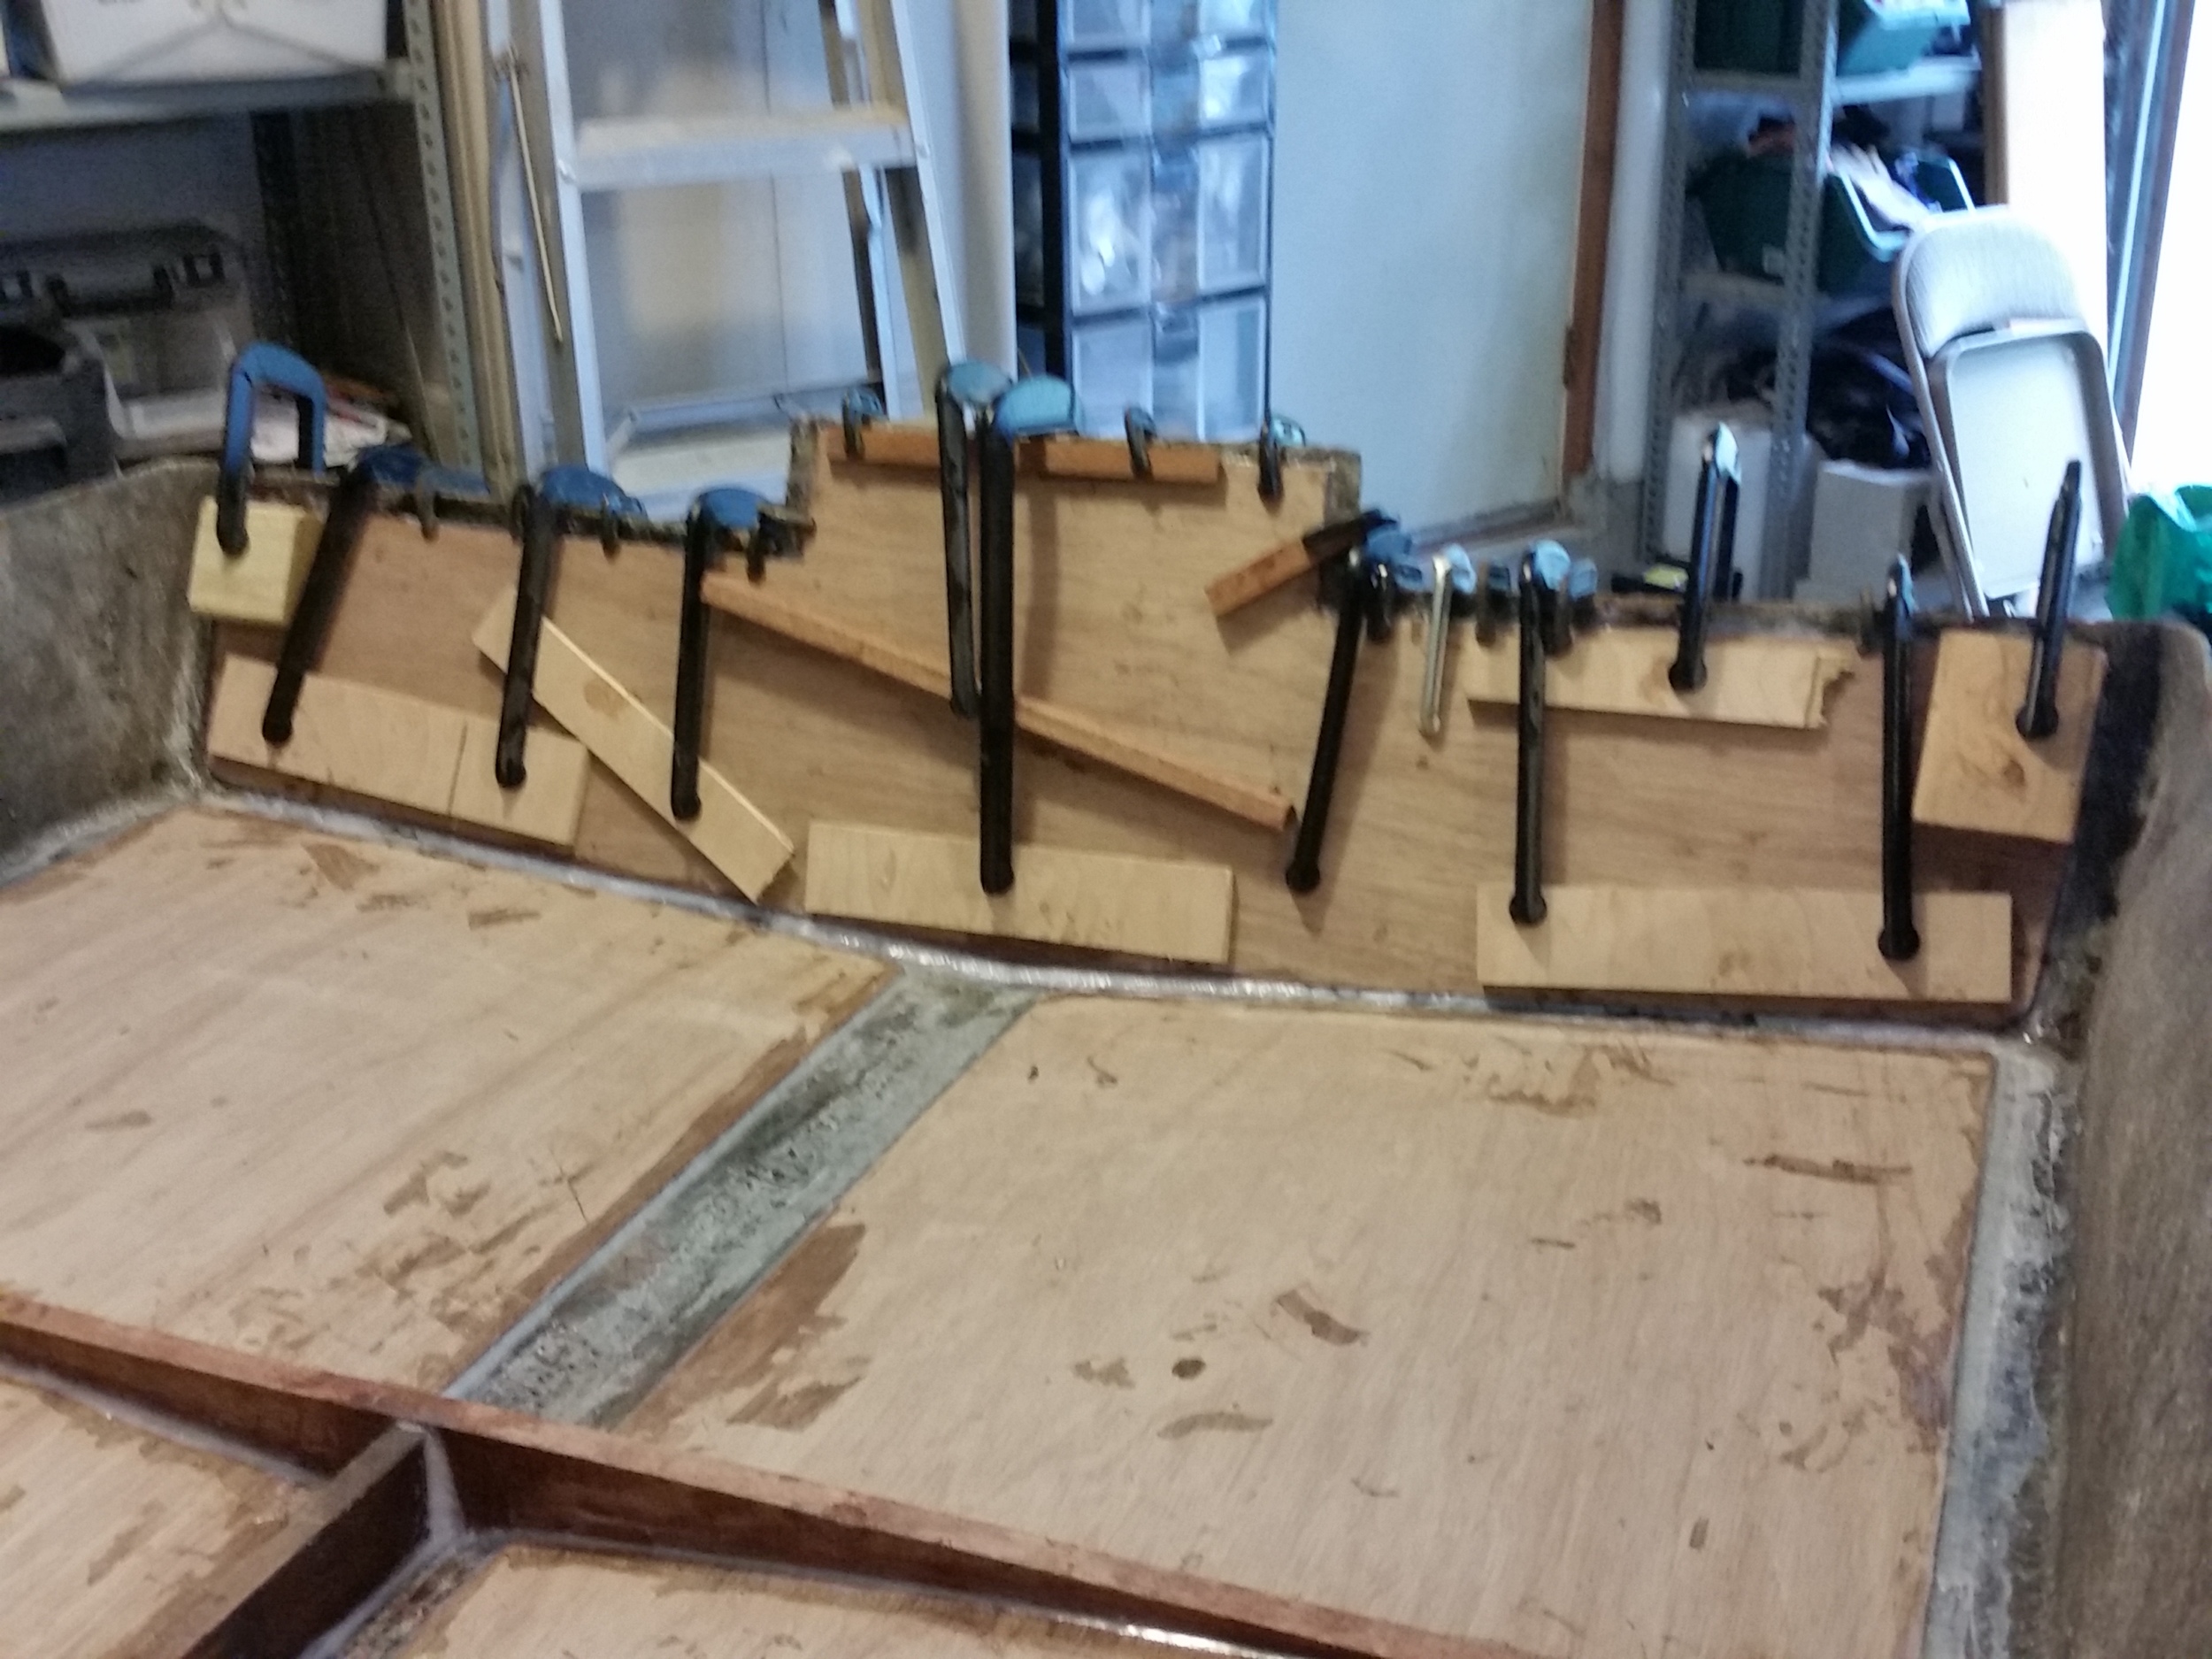
It took quite a few clamps to do the two 1/4" layers across the transom area. They were done one at a time.

The almost completed transom, before some additional filleting with epoxy. Being a typical engineer, since I am not trained on this stuff and don't know how to calculate the stresses and forces and glue strength per square inch, I just overdesigned the crap out of it. Has two layers of 1/4" across the length, and a 5/8" piece in the center with two double-thick angle braces that keep the transom stiff. These braces are heavily glued with thickened epoxy and are captive at both ends, the corners tuck underneath the squares on the bottom and underneath the notches on the 5/8" transom piece. The transom now has absolutely zero flex.

The final transom, with the mounting blocks added on the sides to support the attachment of the aluminum bracket. I thought I was done before, but thankfully I remembered these blocks before fiberglassing this area. I also cleaned up a lot of the epoxy fillets, added more, and filled in the bottom gaps that you can see in the previous picture. Now it really is ready for fiberglass, although I have to do some repair to the top edge (rivet and screw holes) before starting.

After fiberglassing with 2 layers of 6 oz. cloth and 3 topcoats of epoxy. Unfortunately, I will probably have to grind down the top 3 inches of the transom center in a wedge shape, removing 1/4" of the thickest section at the top, tapering down to 0" from the top to 3" lower. This is because the very top of the center section is too thick for the space allowed by the overlaying top half, between the outboard well and the rim.