The Floor
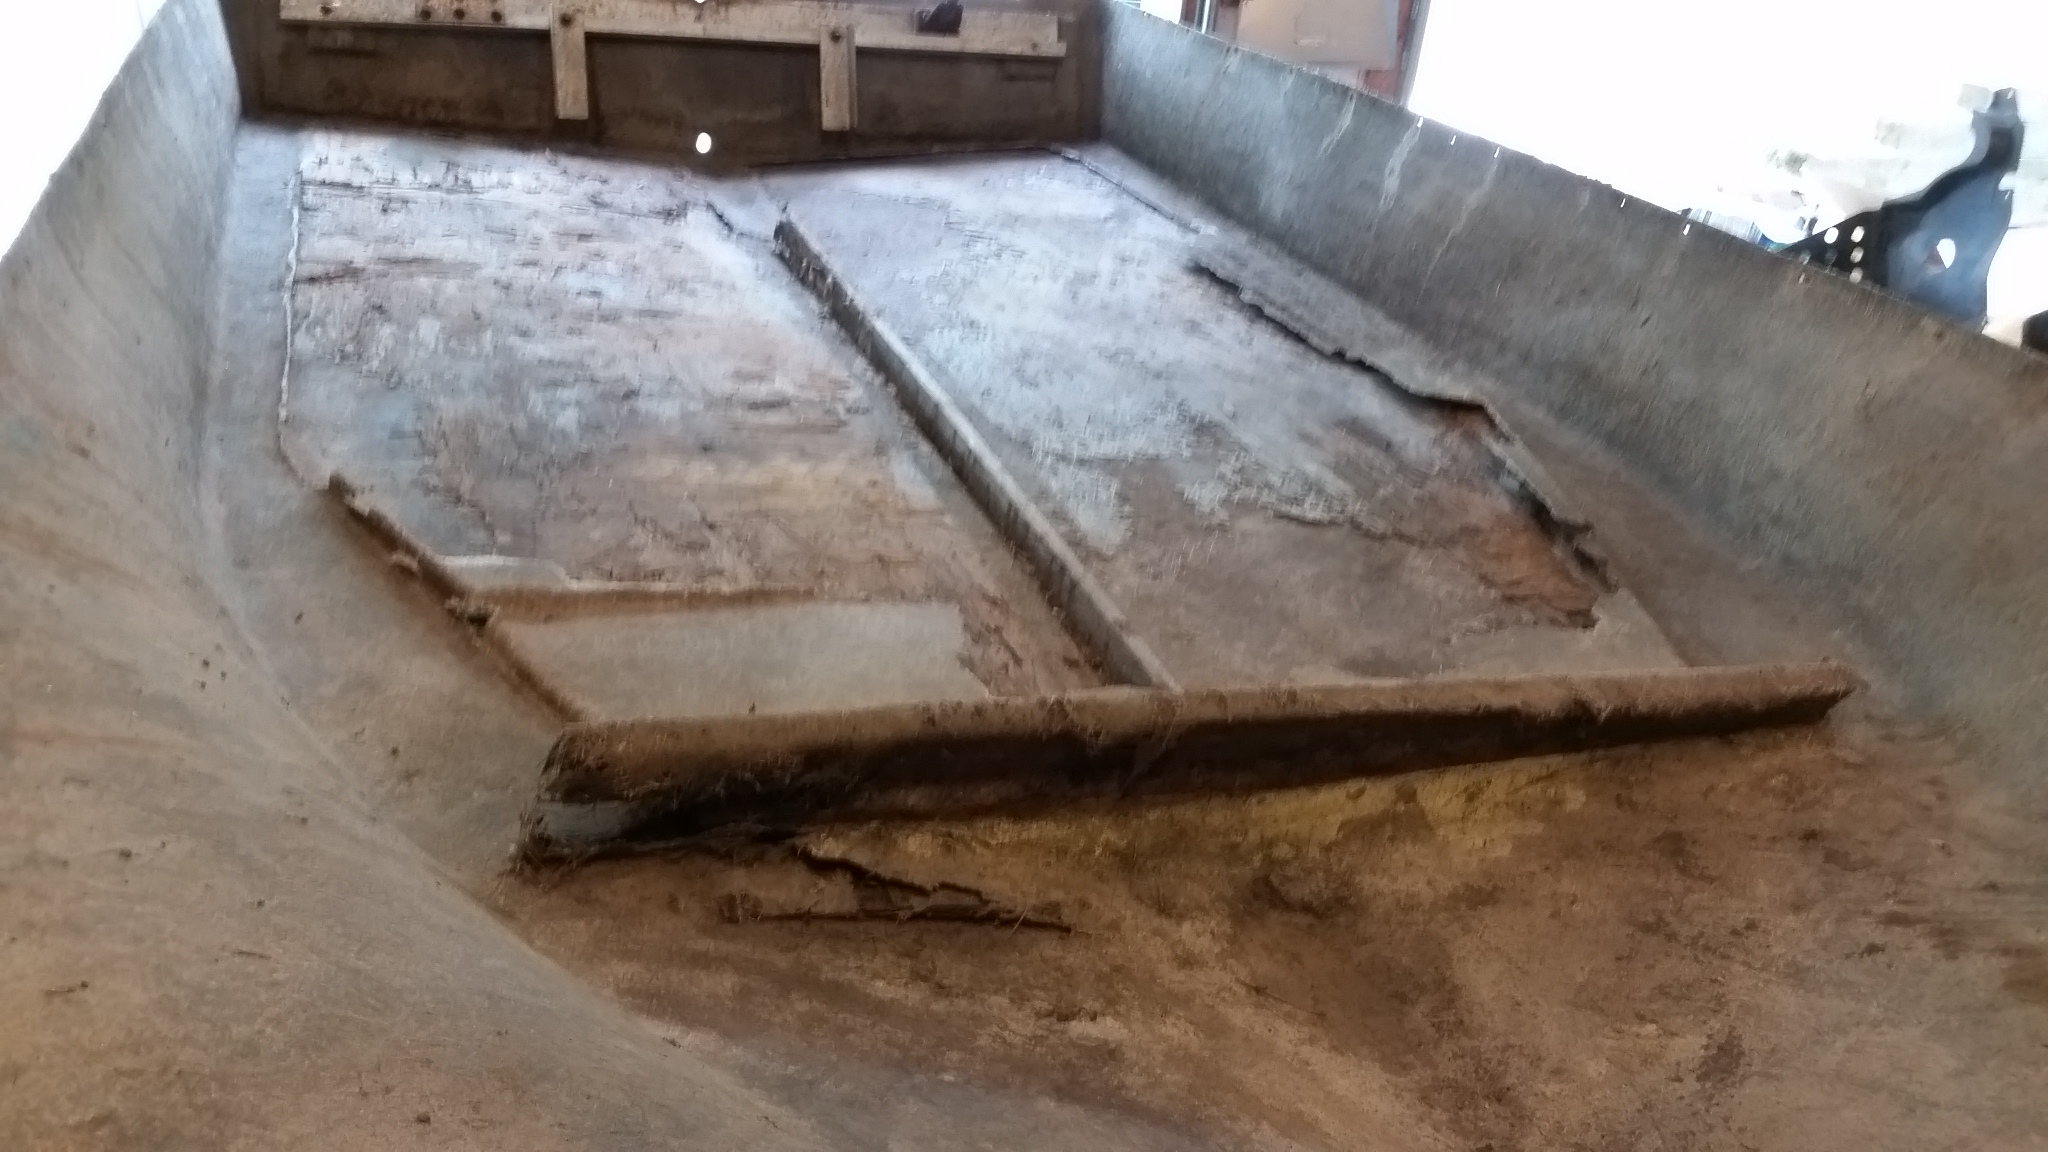
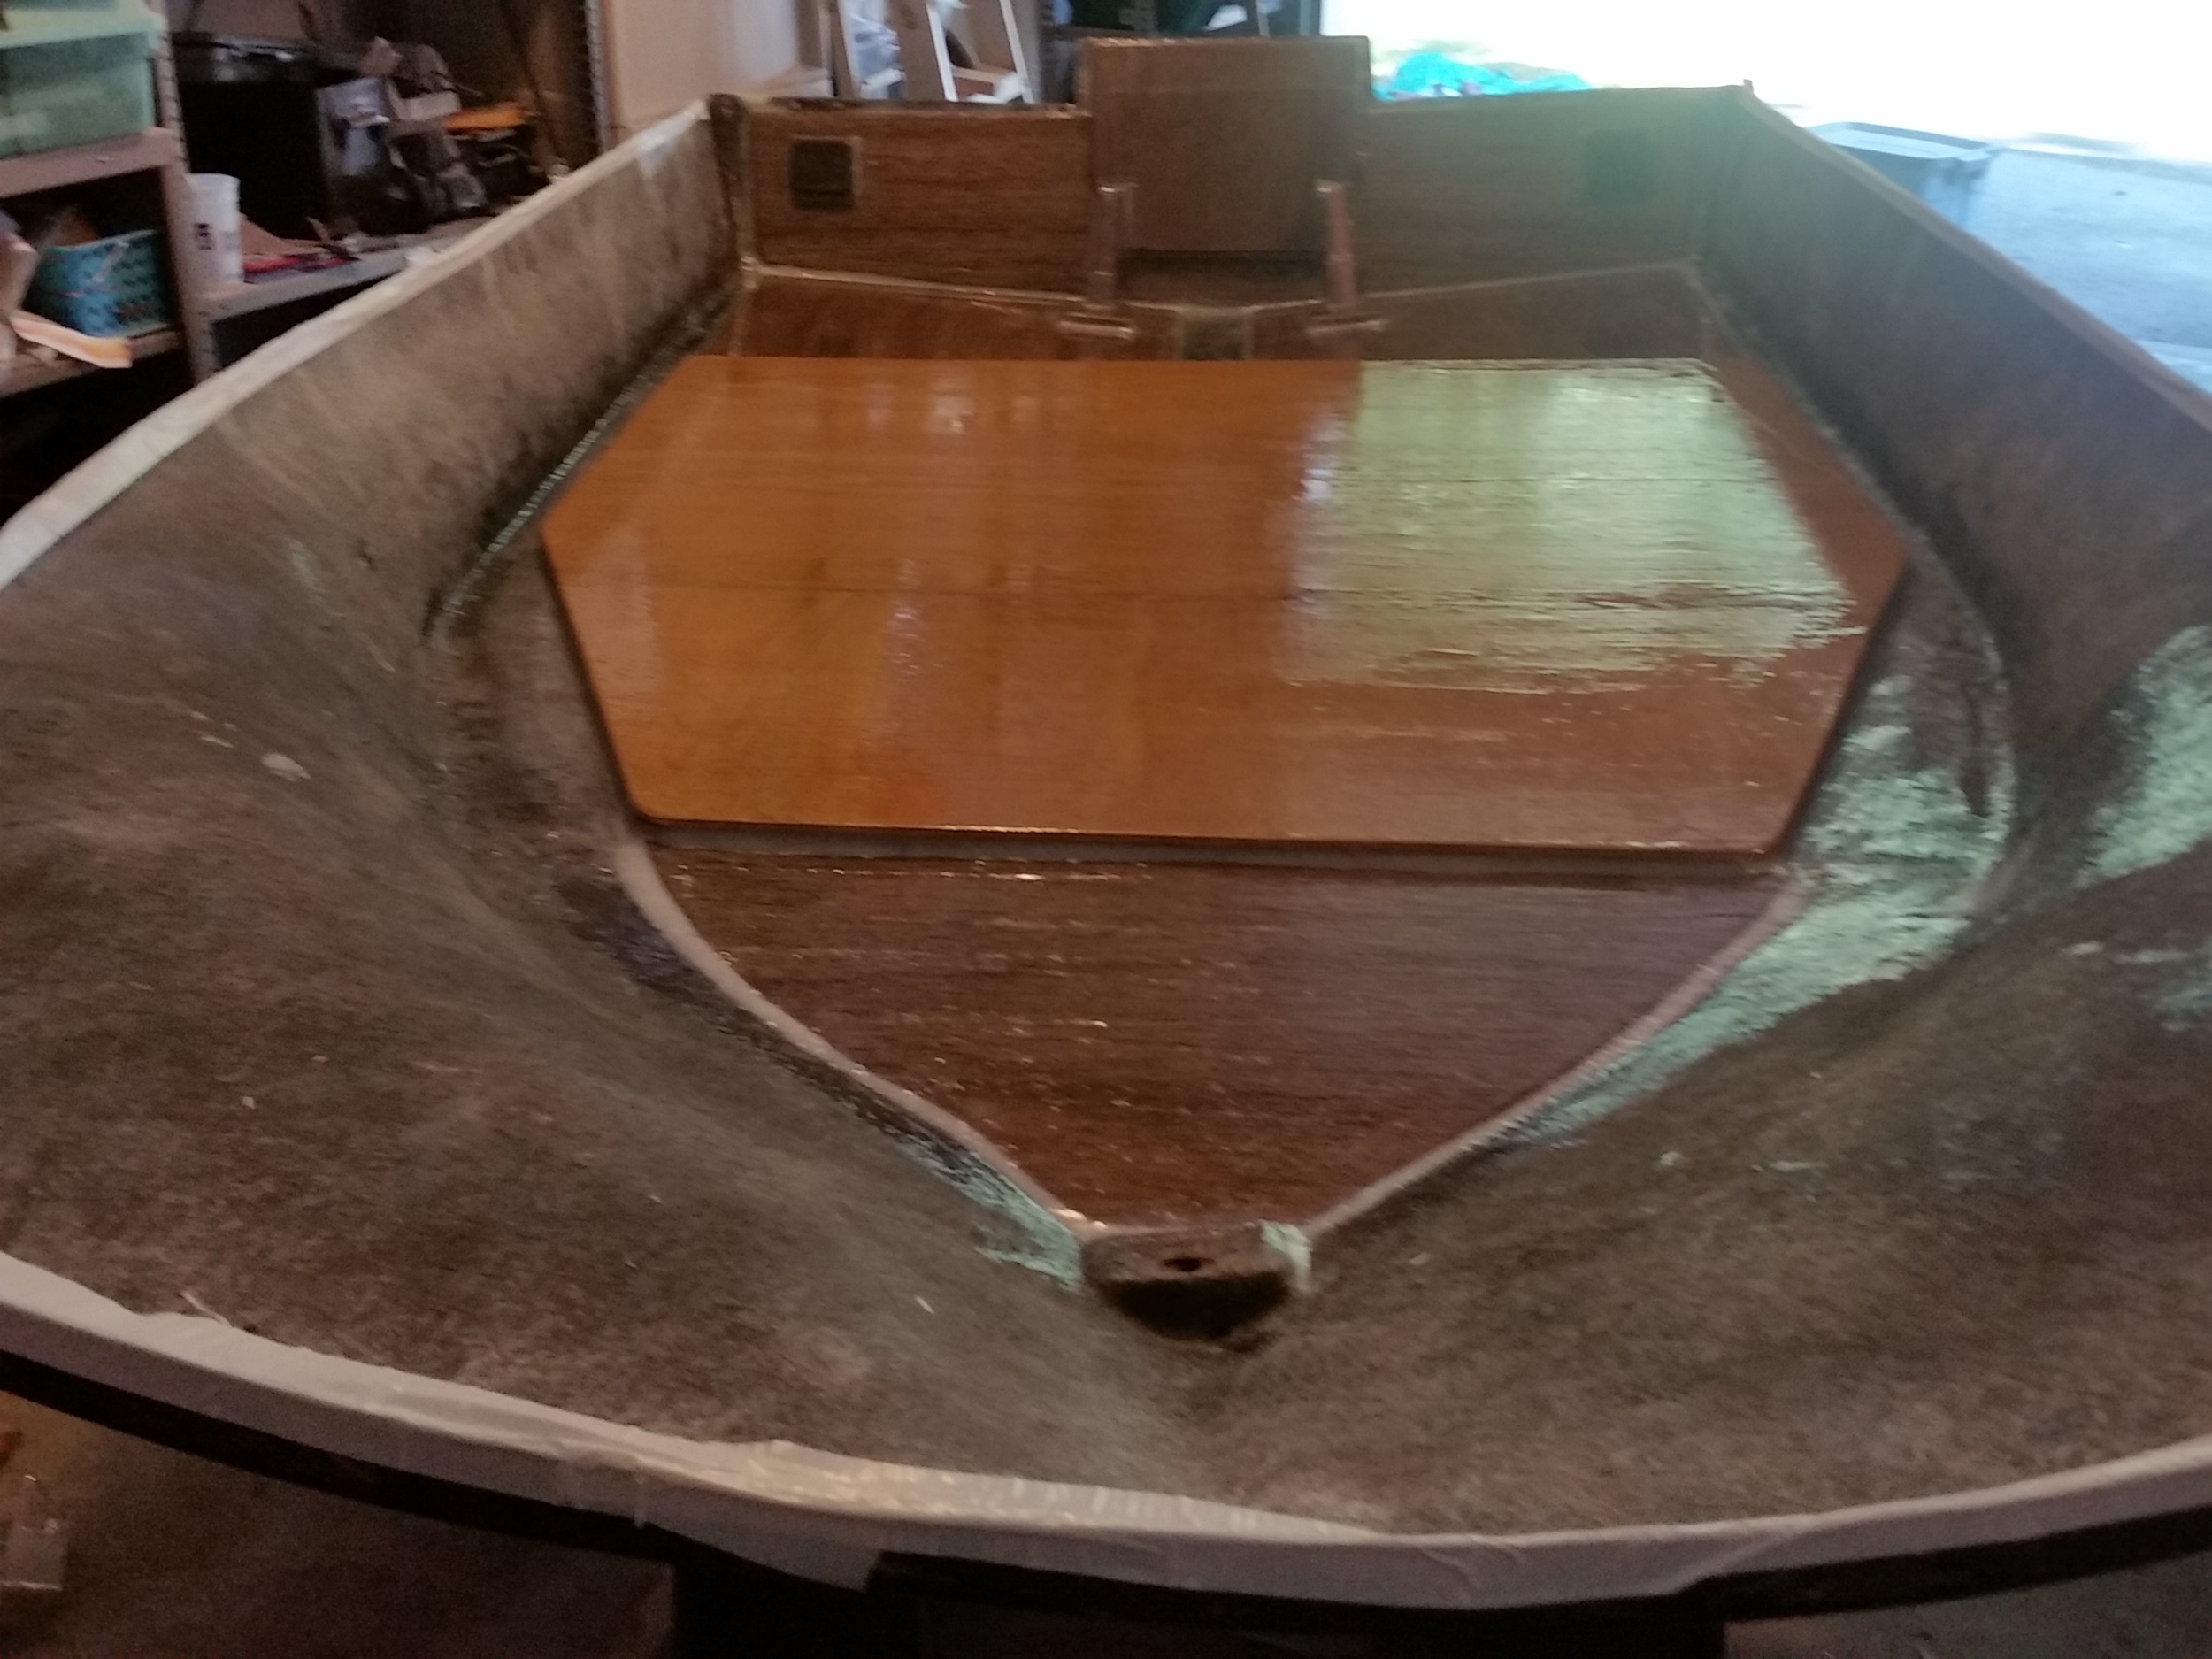
Above is a picture of the original floor once I got it into the garage to start the work. This was taken after a lot of debris removal, cutting off some of the loose fiberglass, and scraping off the loose wood.
All of this stuff in the front section has to be removed. The slanted board seems to have been a foot rest, but I'm not going to recreate it, I will do something else for a footrest.

What a mess ..

Now most of the fiberglass and wood was removed, but there was still a lot of work to do. The keel board in the center was determined to need replacement, the wood has to get completely removed down to the fiberglass, and the perimeter where the floor was cut out needs to be grinded down to remove the extra edge of fiberglass.

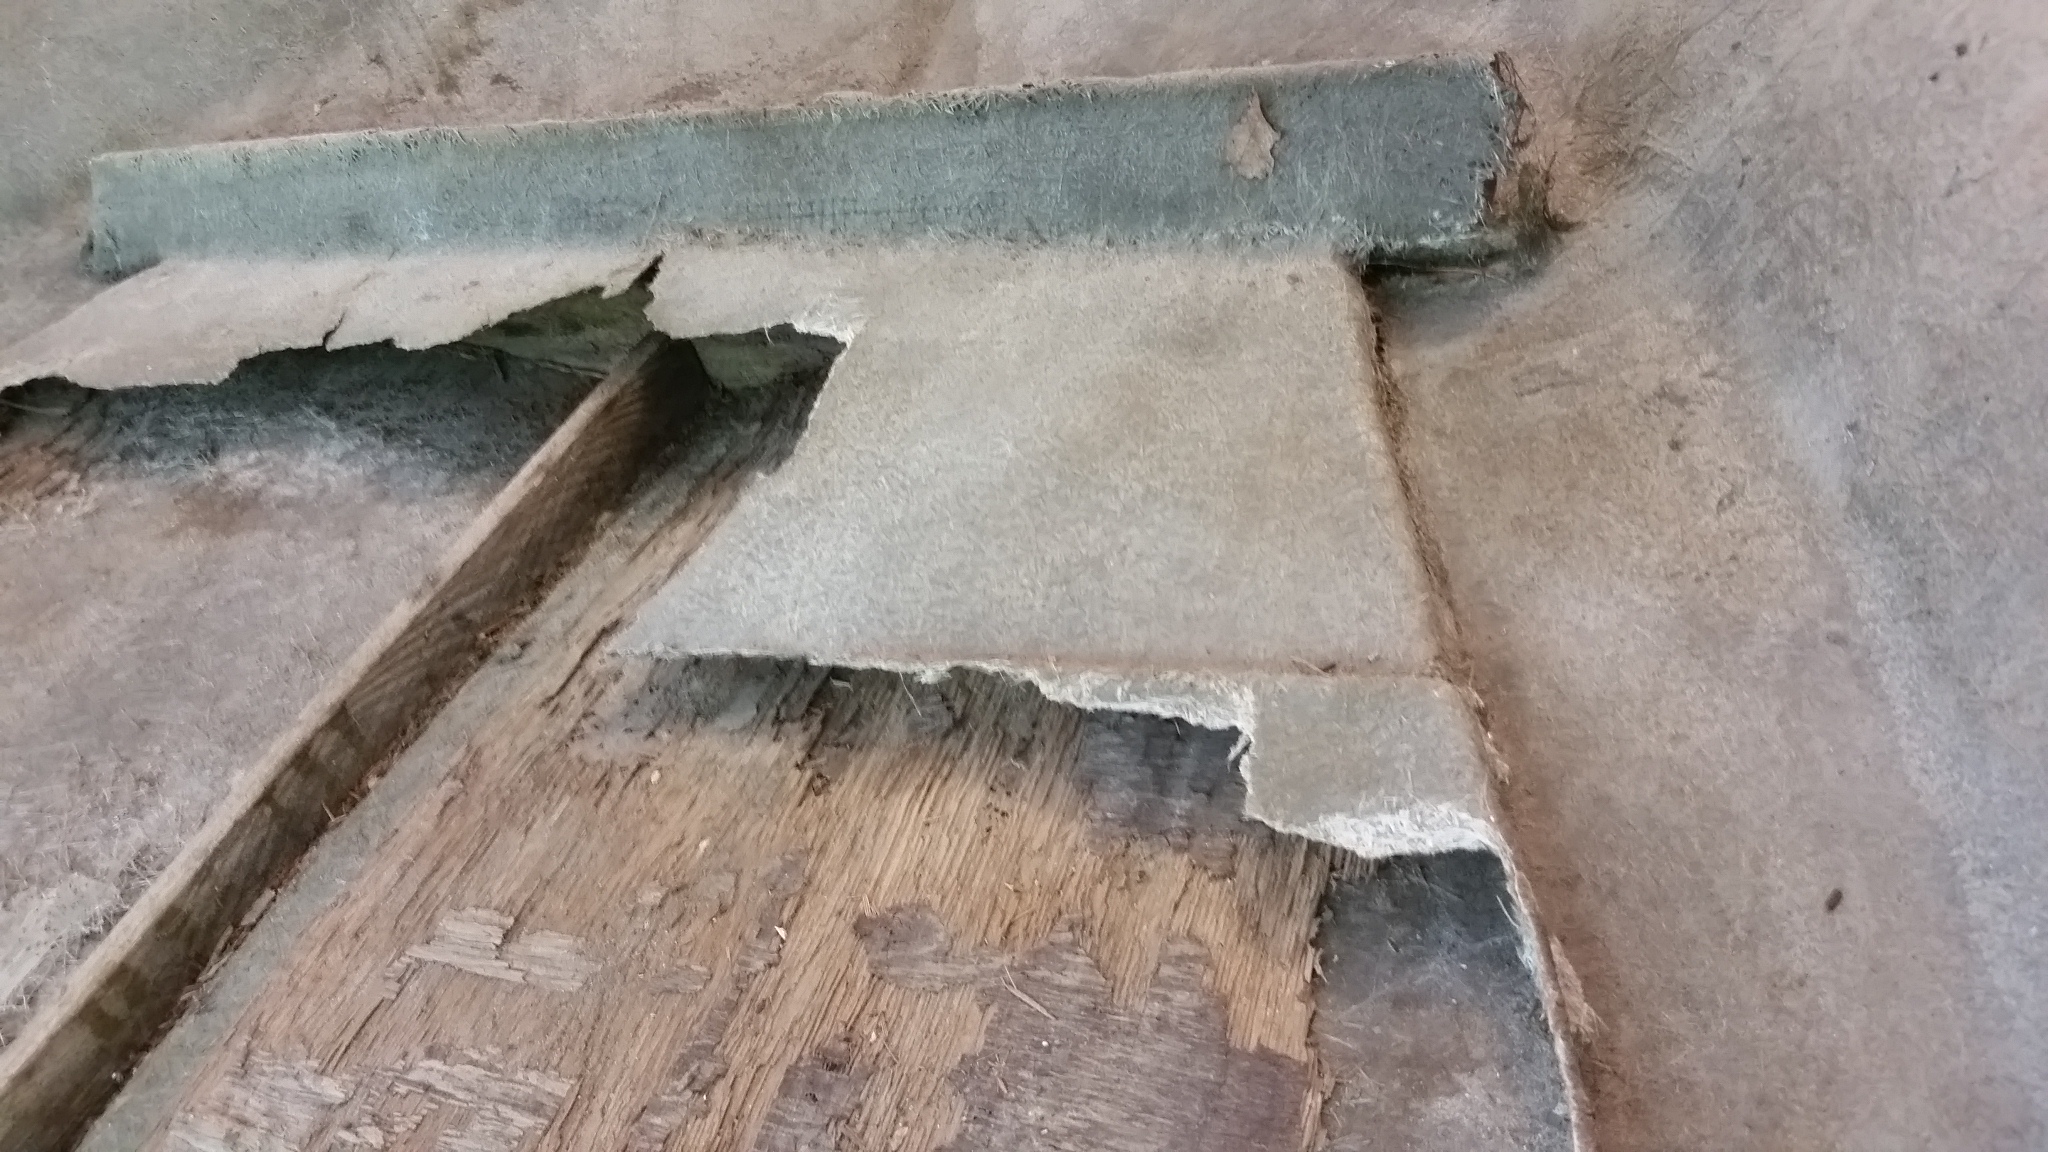
Okay, removing the keel board was pretty much of nightmare. I started cutting the board out with a plunge cutter and realized that there are a ton of screws holding it in, from underneath! So I broke off all the wood in small chunks, and pried out all the wood until all that was left was epoxy and the screws. I removed as much epoxy as I could without damaging the hull, and cut off all the screws flush until I had a nice clean channel for installing a new keel piece. The screws are staying there, but they're getting epoxied in and sealed as best as possible. Unfortunately no pictures of the area after all that work!
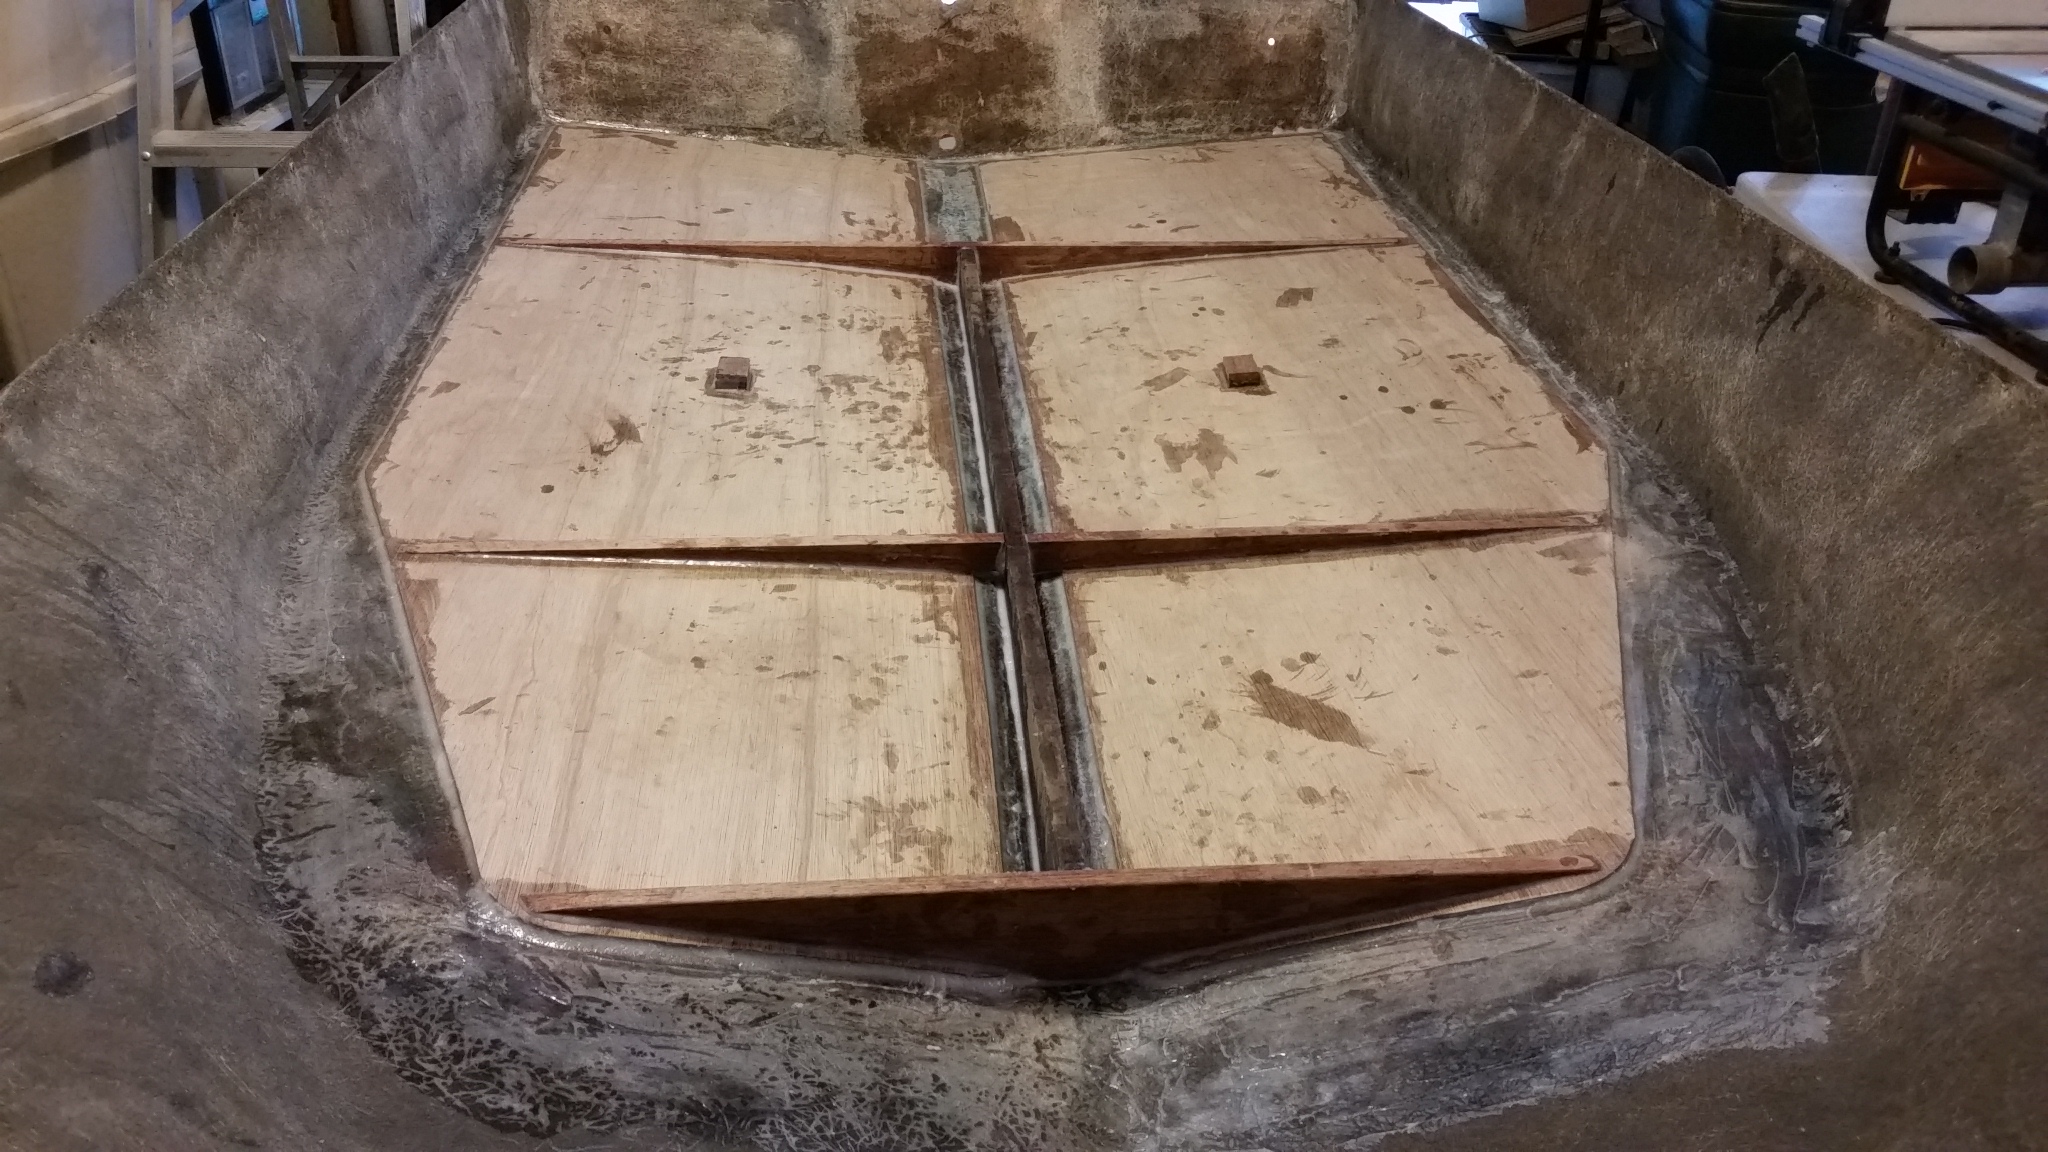
Okay, this jumps ahead a lot, but there are no pictures in-between. First, I glued down the bottom boards with thickened epoxy one at a time, and because of the curvature of the hull, it took over 700 pounds of concrete blocks and sandbags to hold each board down flush to the bottom while it cured.
After the 1/4" boards were down, I used levels and long straight boards of different lengths to come up with the shapes and sizes of the stringers and end boards. I chose the length of the keel first, and cut that piece. Without gluing it in, I would position it in its future place in order to measure all the other pieces. I also used a scribing technique to get the curved shapes of the stringers and end boards. After all those boards were glued in, I put the keel board in last with a pantload of epoxy in that center channel. That board is never coming out.
The bottom boards are mahogany marine ply 1/4", and the 1x4 boards (keel, stringers, end pieces) are all mahogany. All the seams and edges have fillets of thickened epoxy to fill the corners, strengthen the bond, and it helps for fiberglassing. This is designed to have a 3/4" floor (also marine ply) that will be in two pieces because of the size. The little blocks in the middle are to prevent bowing if there is significant weight on the floor. The seam for the two pieces will be side-to-side across the center (not down the middle over the keel), and it will extend between the two boards at each end of the keel.
Before I put the 3/4" floor on top of this, I am going to put down one layer of fiberglass cloth and epoxy, in case water ever gets in there. I will leave the bonding surface (the top edges) for the floor bare, so that I can get a good bond to the floor when it gets glued down.
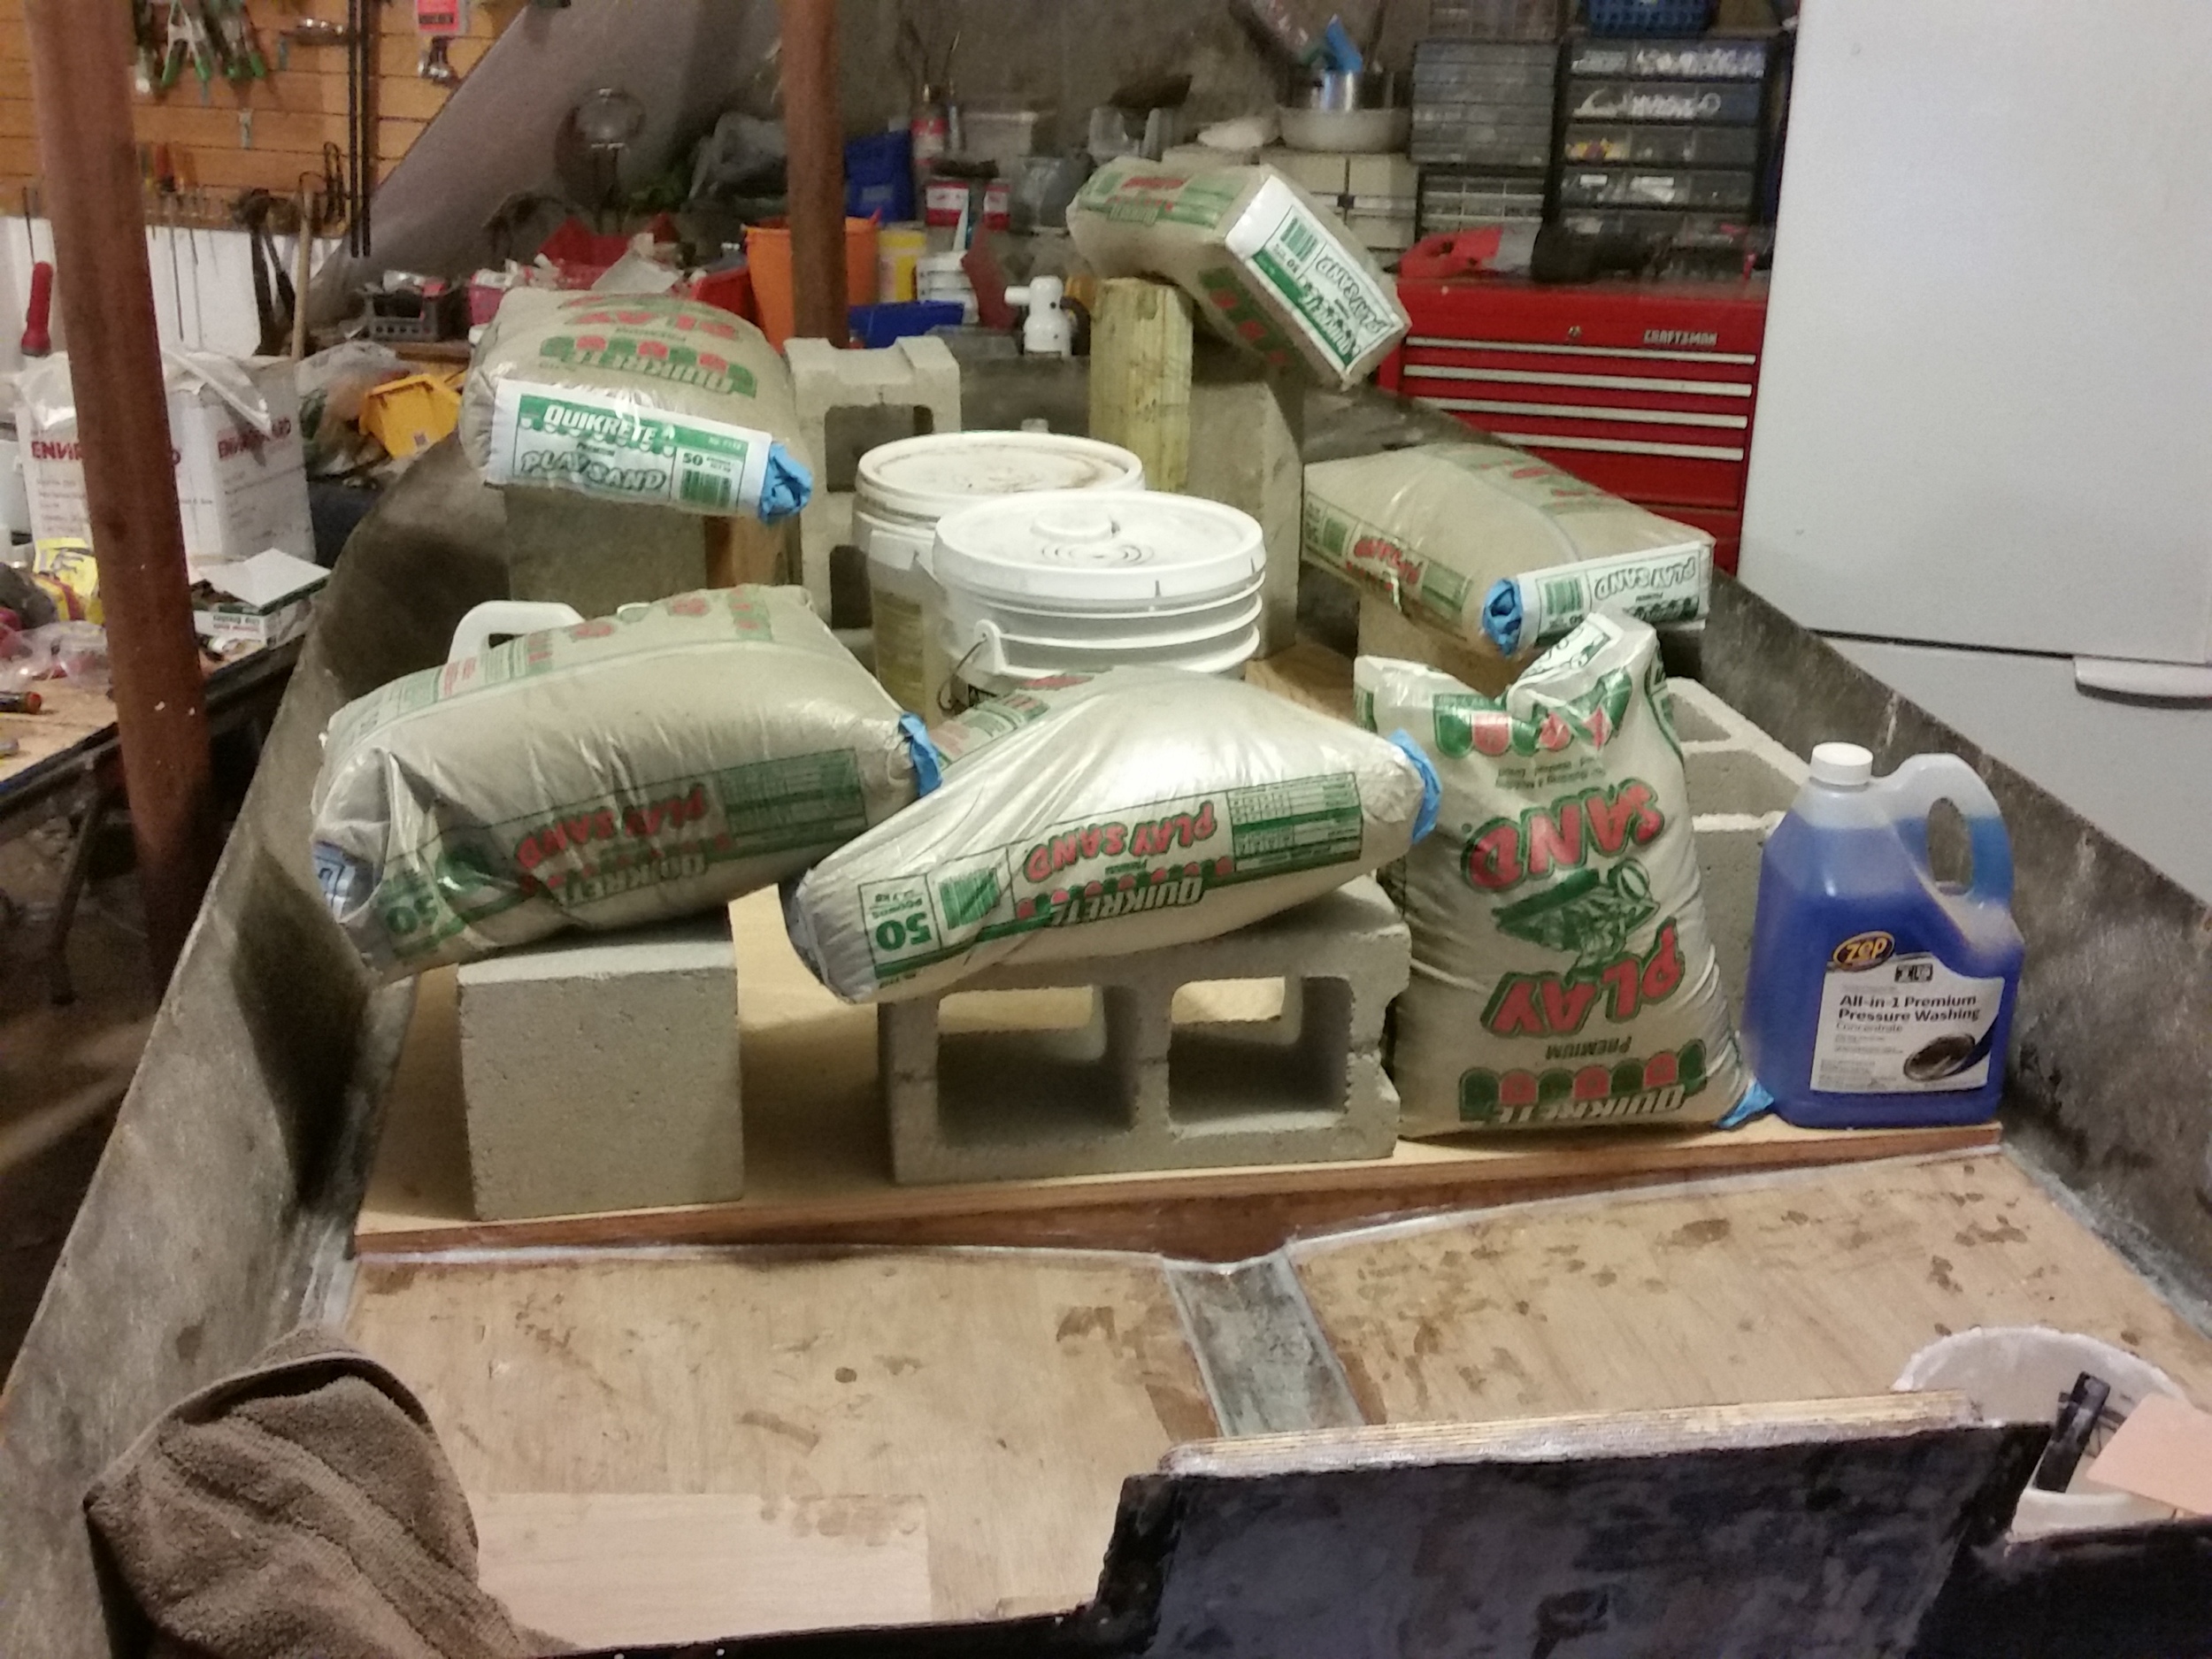
Above, I added the two floor pieces and have around 650 lbs of weight holding it down to clamp it in position while the epoxy cures.

Now the floor is done, all the edges have been rounded and it is ready for fiberglass.
Above picture taken after the entire bottom is fiberglassed with 2 layers of 6 oz. cloth in the transom and bilge area and 1 layer of cloth on the seating area and forward. On top of the fiberglass layers is 2-3 coats of epoxy. I had to add this extra little triangle piece at the front because the shape of the boat allowed water to collect there.
